Dirt, gardening, Sustainable Living

Hardy Tomatoes

Everything we did to help the tomatoes ripen such as reducing watering, removing stems/branches not holding tomatoes, removing leaves to allow the plant to dry and feeding them compost (‘plant food’)…..worked!!

IMG_1524.jpg

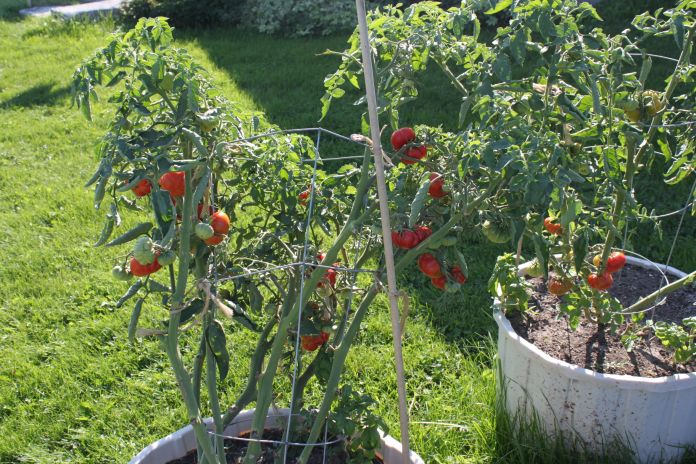
The tomatoes are plentiful and red.

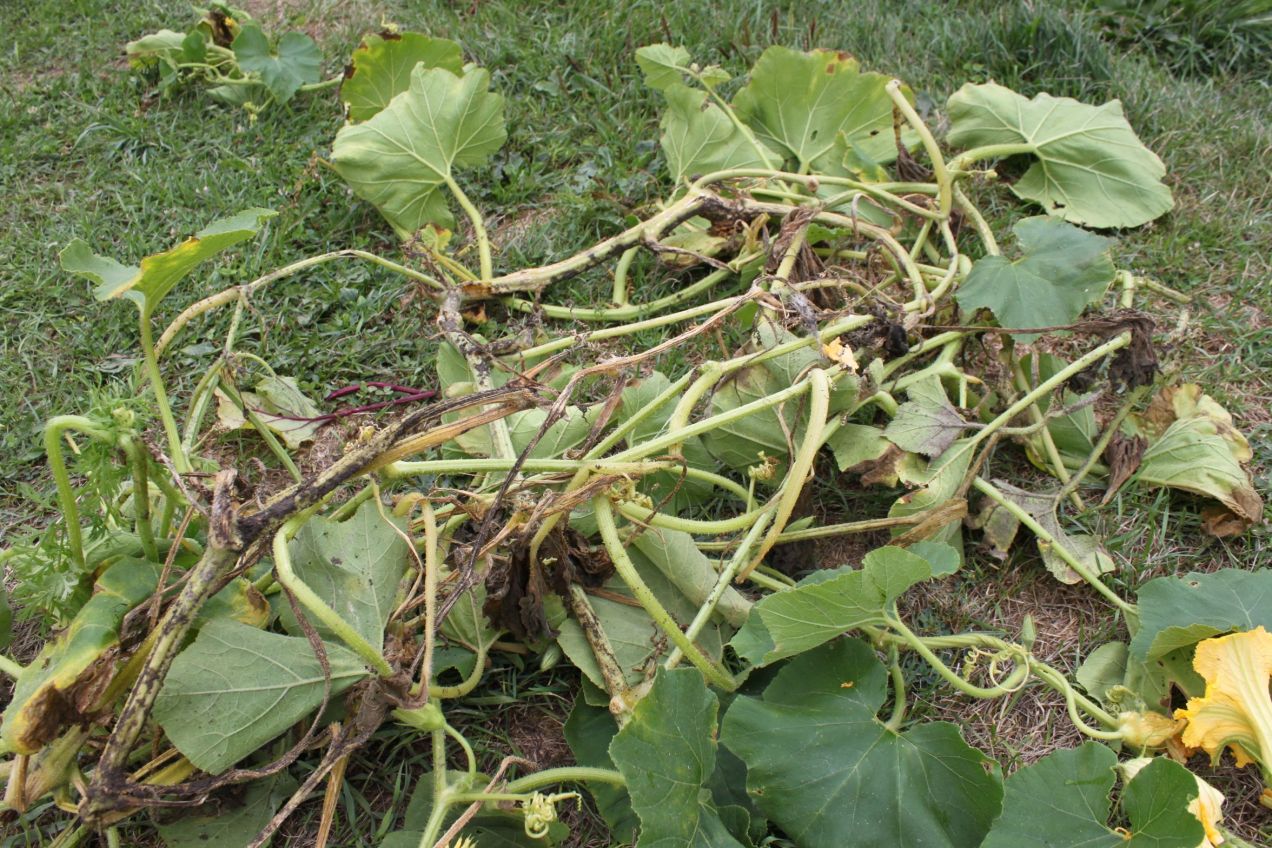
I picked as many as I could yesterday, plus a few green ones in order to cut back more of the plant and encourage the last few to ripen before the frosts start – it was only 8 degrees C this morning!!

IMG_1530

As I harvested and cut down more branches I was startled to find more tomato plant flowers starting and even more growth starting.

IMG_1533.jpg

So the major lesson I’ve learned from growing tomatoes….

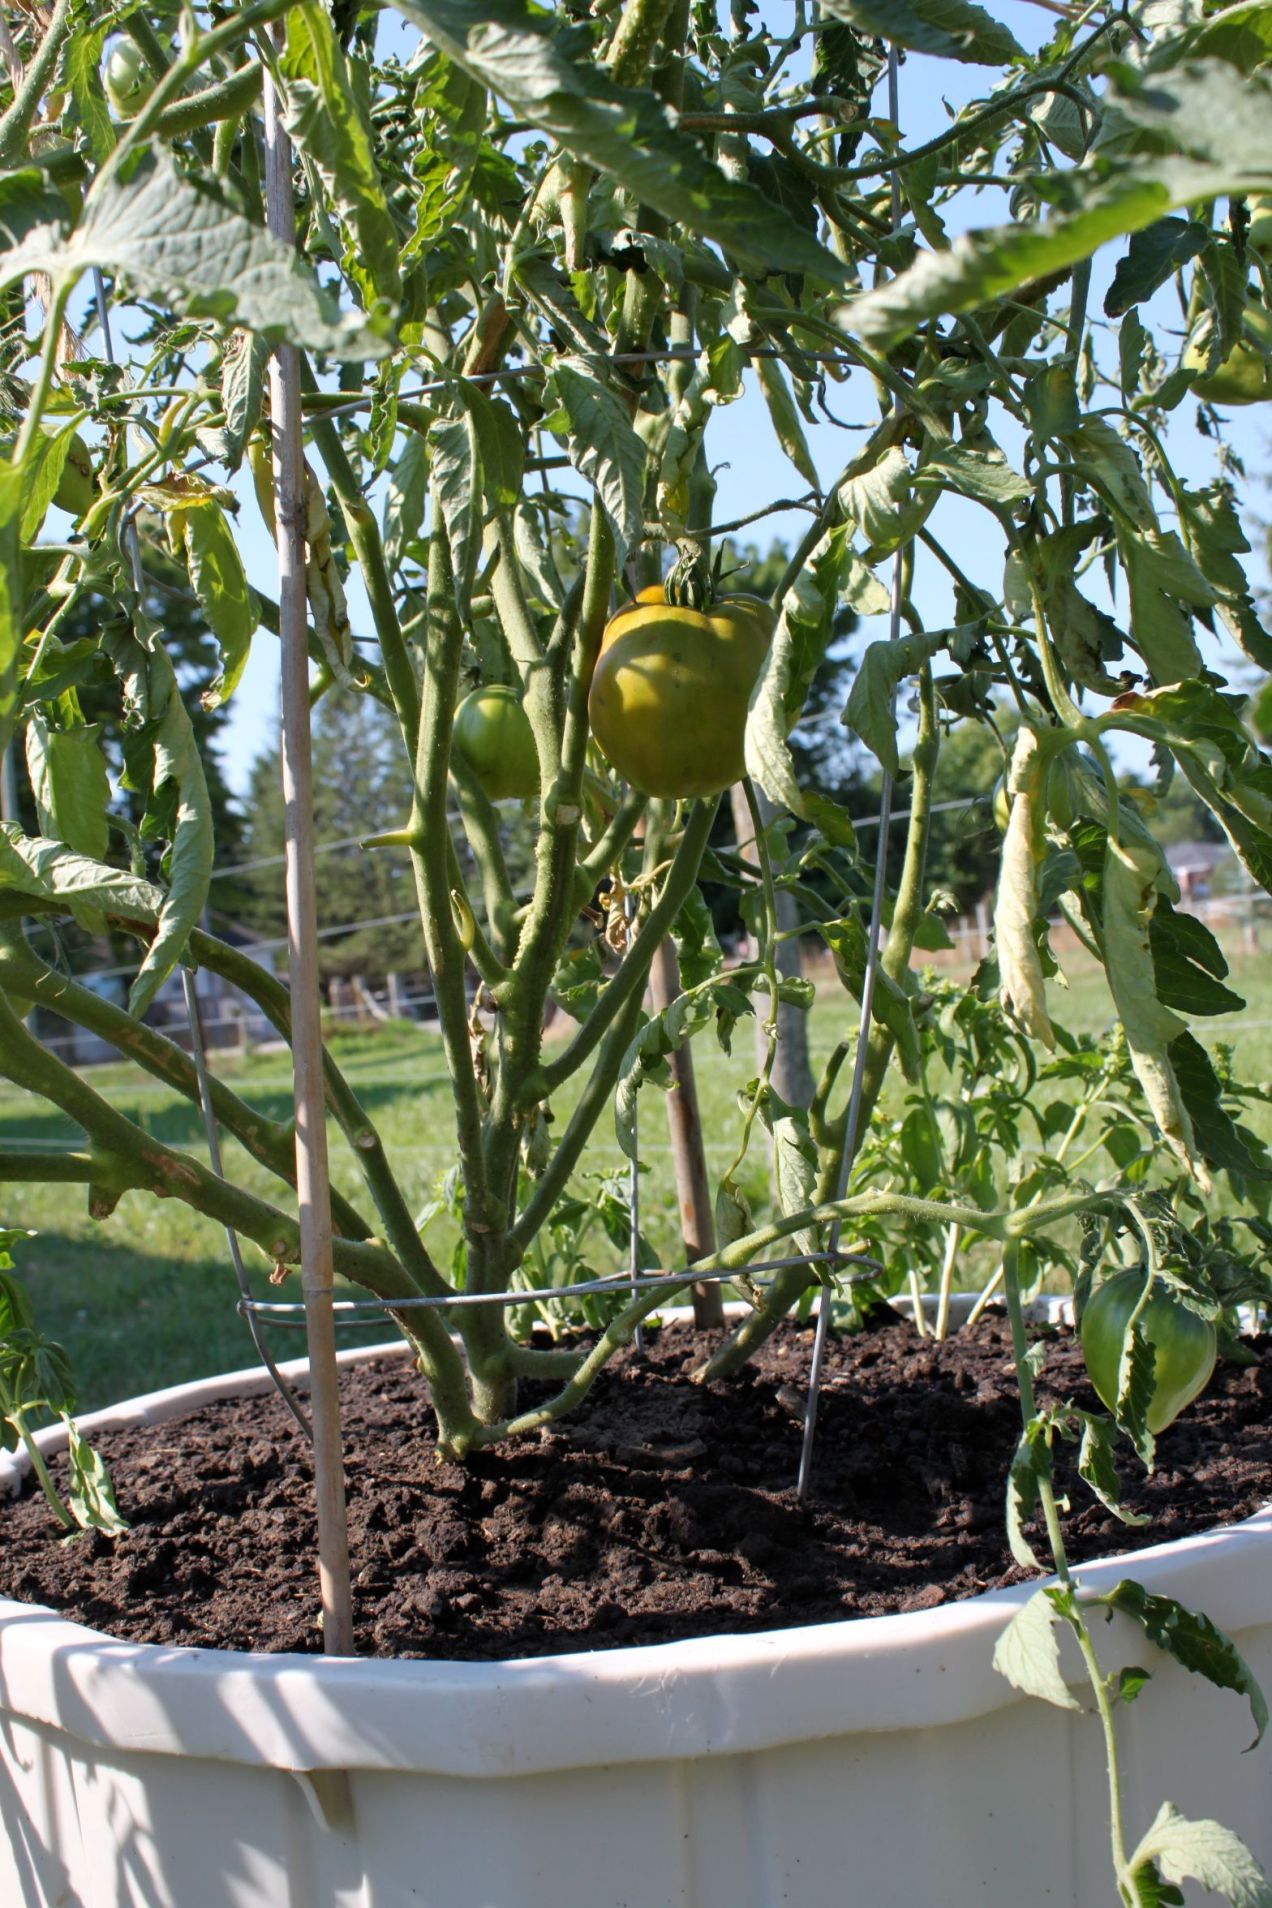
They are very Hardy!! Do not baby them, cut them early and focus on one main stem for the plant. The picture below shows how long the one branch had grown once I had stretched it up.

IMG_1542.jpg

Even though I had them ‘caged’and a stake in order to tie the cage to, I think it would be best to only have a stake to tie them to and skip the cage altogether. Of course, this would be ideal when only 1 stalk on the plant was allowed to grow, instead of 4-5+.

So Don’t Be Afraid to Cut!!

Cut, Cut, Cut I say for tomato plants. I’ve massacred these plants at least 3 times and have only encouraged tomatoes to mature and haven’t hurt the plant at all.

Next year I hope to start the tomato plants inside, but not as early. When I plant them, I will be sure to cut off the lower leaves or branches starting out to ensure only one main stem is present. Next, I will stake the plant right away and not cage it. I think ‘caging’ the plant decreases air flow and encourages blight to become present from too much moisture.

I am so very glad that we were able to keep the blight from spreading with the work we put in; it would have been so disappointing if it had spread and we were unable to harvest any tomatoes this year.

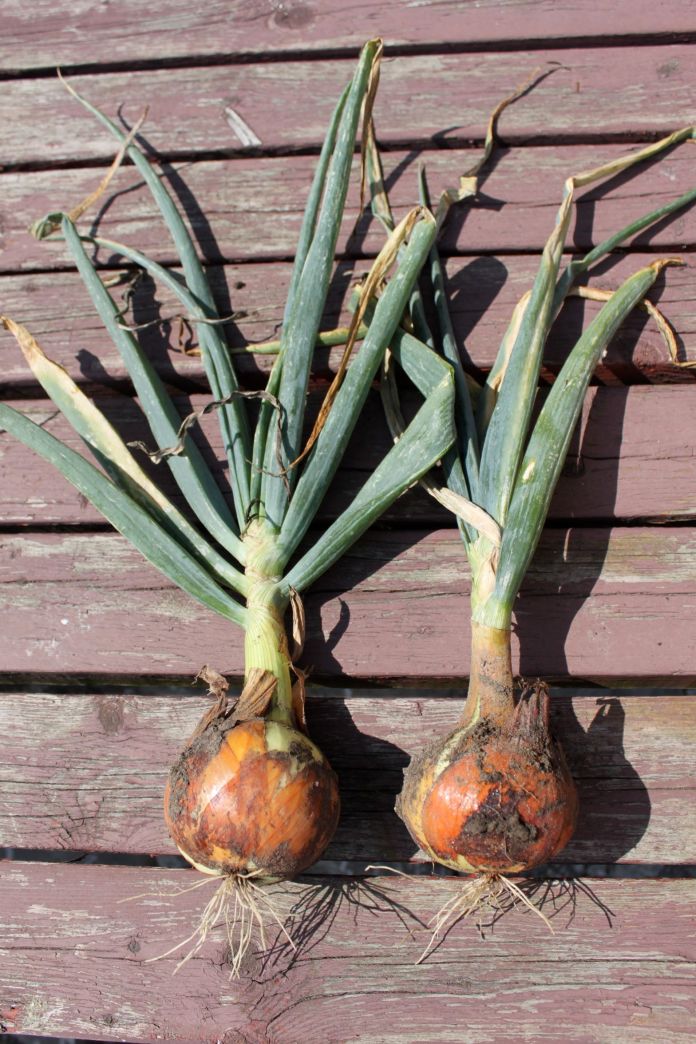
While we were in the garden, we also picked a couple of ‘winter’ onions and have left them on the deck to dry out….

IMG_1558IMG_1559IMG_1565

We are well prepared for what we need to do next year for the tomato plants, and we look forward to sharing with you next spring.

As for the winter onions…no lessons learned because they were so easy to grow. Much stronger in aroma than store-bought onions, it’s only more apparent every time I harvest that “Fresh is Best”.

Standard
gardening, Herbs, Sustainable Living

Basil Seeds

Looking at this beautiful basil plant grown from seed this spring, I know I will want to plant & grow more next year.

IMG_1377

When the basil plant ‘went to seed’ , I picked off the stem sections that were covered in seed and allowed them to dry (seen below…)

IMG_1512

I also picked them and took the seed pods off before drying the stems…

IMG_1508

Either way, the seed pods must be left to dry in order to get at the little basil seeds inside (approx 4-5 seeds/pod)…

IMG_1509

A bit painful because it’s such a tedious job, our neighbour & garden connoisseur Rocky, told us we don’t have to get the little ones out, just allow the pods to dry & plant them.

Every time we pick the basil, it seems like it will be the last time, every time. We pick stems gone to seed every time & pick as many leaves off as we can. We dry them in the food dehydrator to speed the process up and store them in mason jars. And then we return 2 days later and do the whole process over again!

To the “Last Time”, the really last time for picking the Basil, who knows how long it will last 😉

Look forward to our post next spring regarding how the planted ‘pods’ do in comparison to this years’ planted seed – thanks for reading.


Standard
gardening, Sustainable Living

Bye-Bye Cucumber & Squash Plants

IMG_1446.jpg

This is the cucumber plant in the compost.  About a month ago I posted ‘Keep the Cukes Dry’ and showed how the plant had grown down into the grass below the container. It was all tangled in the grass and I had to free it in order to cut the grass. This proved to be a grave mistake; the plant stopped growing and stopped producing and maturing cucumbers already on the vine.

The same thing happened to the squash plant.

The squash plant was all tangled into some weeds because it grew beyond the garden boundary. I know it was also getting too wet in that spot because I discovered four small squashes had already rotted.  But, it was after I disentangled the tendrils from that spot that it really took a turn for the worst.

IMG_1435.jpg

In the picture above, you can see how some of the vines have died and in the pictures below, how the squash have died and stopped maturing…

IMG_1431IMG_1441

Interestingly enough, there were new blossoms as can be seen further down the vine from this rotten squash.  However, there would not be enough time for the squash to mature before the frost starts, therefore I pulled the entire squash plant out.

When I did, I discovered that it had rotted out at the root; way too much water and not enough of  a ‘hump’ or pile of dirt to keep the base of the plant dry.

IMG_1429IMG_1430

I took the two most mature squash off the vine…

IMG_1443.jpg

And plan to leave them in the sun until the ‘stems’ go brown from being dried. I think I will use them in a soup as they are not very big and I can mix them with yams, carrots or another squash.

Also that day we harvested some beets, tomatoes, and carrots from the garden

IMG_1444IMG_1458

We also spent some time adding more dirt to the carrot and beet rows to ensure they were well covered. We did this to the potato plants as well because the plants were starting to fall over.

So the lessons learned in regards to Vine plants:

  1. NEVER pull the plant’s tendrils away from where they are anchored.
  2. Provide a trellis for the vine plants to grown and anchor to.

Other little lessons we learned:

  1. Thin carrots to ensure they mature to a certain thickness.
  2. Plant rows of vegetables (example here are carrot and beet rows) far enough apart to get at the garden dirt to ‘hill’ rows to maintain vegetable depth. Dirt is washed away during watering and hard rain and should be replaced to prevent sun exposure.

Keep posted for more garden updates, lessons we have learned and recipes featuring our home-grown vegetables 🙂


Standard
gardening, Sustainable Living

Keep the Cukes Dry!

As with our squash, tomato, and, garlic we’ve also been overwatering our cucumber plants.  We were overwatering to the point that the little cukes were soft and brown while some of the new blossom areas were fuzzy and ‘moldy’ looking.

IMG_1326

We cut off any ‘yellowed’ and sagging segments, filled the container with a few inches of fresh soil and have also decided to only water in the morning.

Like the squash plant, it has grown and started to travel a little.

On July 4th they looked like this…

IMG_1191.jpg

On July 16th, they looked like this…

IMG_1272.jpg

Today they looked like this…

IMG_1372

above picture is from the front, while below picture is from the back

IMG_1374.jpg

Parts of them still look a little worse for wear, but they have new blossoms coming and two healthy looking cucumbers that we are trying hard not to harvest.

Happy with our gardening adventure and the learning curve that comes with it, I’m still surprised that one of our biggest piece of education has been ‘Not To Overwater’!

For seedlings and plants starting out, watering is great, but when a plant is established, backing off of the watering (‘babying’ them ?) is probably the better way to go.

Still feeling in Love with Gardening despite its less than perfect Nature


Standard
gardening, Sustainable Living, vegan

The Year of Learning The Tomato

I thought we would be riding the wave for the “Year of the Tomato” but unfortunately, it is the “Year of Learning the Tomato”.

We have beautiful Tomato Plants, or we had beautiful plants I should say.

On Sunday we had a neighbour stop by and I asked him to take a look at our garlic. He has grown garlic for many years & does an amazing job.  He laughed when he came around the corner to the containers because the tomato plants were so huge!

We had been doing our best to keep new feelers pinched and to discard branches and extra leaves to encourage tomato ripening. It hasn’t happened, and Rocky explained that we still have too many leaves & branches. In fact, we have too many ‘main’ stems on our plants. It looks like we may have been watering too much too (a first timer like me didn’t think that was possible!).

All of the extra plant and too much watering has created a storm for blight 😦

IMG_1331

So what to do to rectify the situation? I’ve checked google…LOL…and I’ve read once the blight is present, especially if it’s the late blight, then there’s nothing really to be done 😦

One can try an antifungal, but not always does it work. I’m also not really into using sprays. I decided we would massacre the plants as far as we could without killing them, removing all the blighted tomatoes we could find, add fertilizer and more dirt to increase nutrients and change our watering plan. Now we will only water every other day & in the early morning only to promote drying during the day.

This first picture is from July 16th, and you can see how bushy the plants are…

IMG_1200.jpg

In comparison to these 3 pictures, you can see how much ‘plant’ we’ve removed. This was done on Tuesday in the early morning when cool.

In the last photo, there is a tomato that is beginning to ripen and there is no blight on it, however, I do see two tomatoes below where it is starting.

IMG_1383.jpg

Taking pictures from underneath the plant helps to find ones that need to be pulled off. In this case, both of these tomatoes were pulled & tossed.

So things we’ve learned from our Tomatoes thus far:

  • Tough Love: cut them early! Get rid of extra shoots right away, it won’t hurt the plant, it is more resilient than it looks, and it will only help tomato fruit development later on
  • Do not overwater! And do not get the leaves wet. This only encourages moist conditions for fungi blight to grow.
  • If container gardening, keep adding soil & fertilizer often to feed tomato growth and maturation. Not the plant, but the tomato.

It’s been a great journey, one that is not quite over. We are great growers; that much is evident, but hopefully next year we will be better tomato growers, not just the tomato plant!

And as for the Garlic…It’s doing fabulous! We will have to stop watering it for sure as well though to help it dry out before we can pick it. We did add more dirt to the garlic container as well though because Rocky did mention that garlic buried deeper does better. We planted from cloves, but he has some male garlic going to seed and we may try that next year. He did warn us that it takes 2 years from seed to get the garlic, so I guess the art of patience will eventually make its way into my life.  But we’ll see….


Standard
gardening, Sustainable Living

The Travelling Squash

The squash has been travelling across the garden and has grown through the beets and both rows of carrots. It has travelled around the side of the garage and even through & around the fence.

In the picture below from July 16th, you can see it starting to escape the garden boundary and grow through the beets.

IMG_1257.jpg

Compared to below, the two pictures from today, you can see how far it has breached the garden boundary and how far around the fence on the opposite side it has gone.

For maintenance, we had to pull a lot of weeds from underneath the middle of the squash plant (it was once the garden boundary). It has kept it too wet and 4 little squashes were found to be too soft and, well rather squashable!

This is from August 1st and August 4th:

We will still be careful watering, but at least without the weeds, it will have a chance to dry out better.

Despite the bad luck of finding 4 bad ones, we are having good success with the first ones that we started with. These two are the biggest and the furthest travelled from the main plant.

As the tendrils take hold and more plant travels we have found one squash on the inside of the fence line, and two more on the outside!

There are a few blossoms with squashes to start and new blossoms emerging as we clean up the plant. Both plants are producing the same looking squash and we are now confident that we have all buttercup squash.

The acorn squash plant did not survive. It did not do well after transplantation from inside. We will try again next year and do it straight from seed outside instead. Just one more of the things we’ve learned this first year of gardening.

Standard
Herbs, Sustainable Living

Dehydrating Herbs

As I mentioned, we did a lot of harvesting on Monday which included basil and parsley.

I love adding fresh parsley to sandwiches, salads, and smoothies, but with an abundance of it on hand, I wanted to ensure that nothing was wasted.

So it was time to do a little herb drying.  I am not patient however and I do not have a lot of space right row that is convenient. So for that reason, I decided to use the dehydrator and dry them in an approx 1 hour.

Washed and ‘dried’, they were laid out on parchment-lined trays.

We had 2 trays for the basil leaves and 3 trays for the parsley the first time around. The second time around we used all 5 trays for parsley. We have filled a 500 ml mason jar full of dried parsley and a 1/2 of a 250 ml mason jar filled with dried basil leaves.

We use the chives in cooking, salads, and dressings too much to dry it right now. The chive patch is also pretty small and has not spread like the parsley.

It will be wonderful to have these ‘homemade’ dried herbs to use in the winter in stews, chilis, and soups.


Standard
gardening, Sustainable Living

We’re back & Harvesting!

After being away for 11 days it was a joy to return to the garden. When we arrived home late Saturday night, I checked the garden with my flashlight because I couldn’t wait until morning!

While we were away my Mom & Grandma together looked after watering, while my Mom was the sole ‘massacre personal’ LOL Those darn tomato plants NEED to be regularly manicured.

She did manage to get a picture of the first cucumber she harvested

HPIM1364.jpg

I know the size of this notepad and, using it as a guide I believe the first cuke was approx 4-5 inches long.  It sliced up nicely to go alongside their dinner that night.

HPIM1366.jpg

FYI:  When I purchase a cucumber at the grocer, cut it up & it looks like this, I always find it bitter. To my surprise, the one I ate from the second harvest was super sweet!

Mom & Grams were able to harvest lettuce, beets and beans as well while we were gone.

Thanks to my Mom & Grams for being great garden sitters!

On Sunday we spent time harvesting more beets; they are growing up out of the ground! After pulling as many as we could handle, I buried the beet ‘line’ to prevent sun exposure to the ones still popping out.

The beet tops were cut off, washed and stored for salads. The roots were washed, dried and stored in the cool cellar.

IMG_1339

On Monday morning we were able to harvest beans, cucumbers, hot peppers and basil.

IMG_1302.jpg

We also cut parsley and chives.

Salad at lunch Monday was lettuce, beet tops, chives, parsley, basil and cucumber slices. It was very refreshing and uplifting.

I’ve fallen in Love with Gardening. It is the perfect ‘job’. ‘Work’ hours are early in the morning when it’s cool and late at night again, when it’s cool. ‘Work’ hours are max 2 hours at a time (that length is pretty rare) and some of it can be done sitting down. With lots of help around for watering, it is a team approach with some independant time for Harvesting and Love.

Standard
FOOD, gardening, Sustainable Living

Basil Harvest

The Basil plants have been doing so well and it was time to do a large harvest of leaves.

After plucking the leaves off, they were soaked in cold water to wash and rinsed really well. Left out on towels to dry we were able to fill two large glass containers with basil leaves.

IMG_1297

We will be sharing the abundance with our neighbours & friends – they taste great and are a wonderful addition to salads and vegetable dishes.

Standard
FOOD, gardening, Sustainable Living, vegan

Tomatoes, Squash, Cucumbers & A Beet

Yesterday morning there was a Tomato Plant Massacre! The plants have been growing so much and it was time to get tough with them. We cut off a lot of branches not holding flowers or fruit; the ground around the bins was covered. We also used twine to tie 2 of the plants to their cages. This is to support long thick branches and hopefully prevent them from breaking off.

It was very hot yesterday and last night when I went to water them, they were so limp looking. The basil plants alongside them were also very drooped without the extra shade from the branches we took off. Thank goodness for rain barrels. We well watered the bins before going to bed and we had an inch & a half of rain on top of the well watering. This morning the plants look so much better. There are a lot of tomatoes starting out and giving them the nutrients instead of the branches & leaves will help them grow and ripen.

So many tomatoes…

As for the squash, yesterday we got a picture of a large flower in the plant. Today it blossomed and we can see a squash starting to grow.

The cucumber plant started to blossom and today we can see cucumbers starting to grow…

It’s so exciting to see! We are going away on a trip next week and I think of all the things that we will apart from, it will be the garden I miss the most.

As for the beet….We picked it to see how it was doing below the earth and used the tops in a salad for lunch…this is what is left…

IMG_1254.jpg

They are a longer, thinner style than the usual short and fat beets we see in stores. We’re thinking we can pull more soonish and enjoy them in salads for a month while planting more seed to harvest in the fall – we will keep you posted.

Standard